Honeywell FocusPRO 6000 Series Thermostat Installation Manual Overview

This comprehensive guide details the installation of Honeywell FocusPRO 6000 Series thermostats, including models like TH6320WF․ It provides step-by-step instructions for connecting your programmable thermostat, helping you manage energy bills effectively․ Easily download this essential manual for effortless system setup․
Supported Thermostat Models
The Honeywell FocusPRO 6000 Series installation manual provides comprehensive guidance for a variety of thermostat models within this popular line․ Specifically, it covers the Wi-Fi programmable thermostats such as the TH6320WF, including its specific variants like TH6320WF02 and TH6320WF1005․ These models are designed to control energy bills effectively and are suitable for systems with up to 3 Heat and 2 Cool stages․
Beyond the Wi-Fi enabled units, the documentation also extends support to other FocusPRO TH6000 Series models․ This includes the TH6110D, which is configured for 1 Heat and 1 Cool system applications, offering straightforward temperature control․ Additionally, the manuals provide detailed instructions for the TH6220D and TH6320U models, ensuring users have the necessary information for a broad range of FocusPRO 6000 installations․ This extensive coverage ensures that whether you have a basic or more complex HVAC setup, the relevant installation steps are readily available for a seamless process․
Accessing the Installation Manual
Accessing your Honeywell FocusPRO 6000 Series installation manual is straightforward, with various comprehensive resources available online․ Many users can find and download the necessary guide for free, often in PDF format, directly from Honeywell’s official support pages or reputable thermostat manual websites․ For instance, specific links like http://www․forwardthinking․honeywell․com/related_links/thermostats/focuspro_6000/install/69_1920es․pdf offer direct access to the comprehensive instructions for models like the TH6000 Series․ Additionally, sites such as thermostatmanuals․com provide installation guides for specific models like the TH6320WF, detailing every step required for connection, including variants TH6320WF02 and TH6320WF1005․ These online resources allow for easy viewing and downloading of the manual, ensuring you have a step-by-step guide for installing your system effortlessly․ They contain all the necessary wiring diagrams and configuration steps, making the installation process manageable for homeowners seeking to control their energy bills effectively․
Preparing for Thermostat Installation

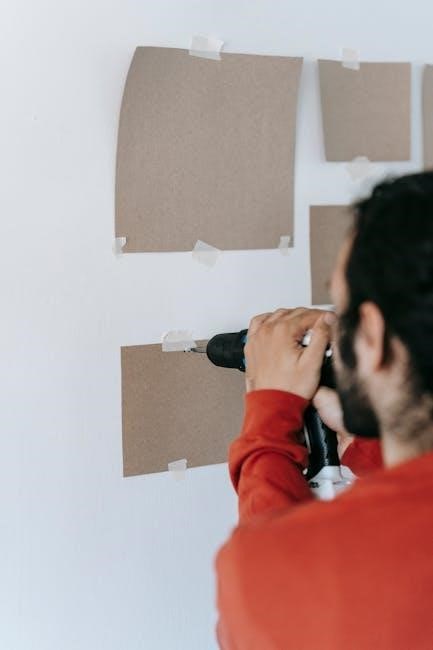
Before mounting your Honeywell FocusPRO 6000 thermostat, carefully prepare the wall․ This involves removing the existing unit’s wallplate, ensuring proper wire access, and marking new mounting locations for accurate placement․
Removing the Old Thermostat Wallplate
Before beginning the installation of your Honeywell FocusPRO 6000 Series thermostat, it is imperative to safely remove the existing unit’s wallplate․ First, always ensure the power to your heating and cooling system is completely turned off at the circuit breaker to prevent any electrical hazards․ Locate your old thermostat and carefully detach its main body from the wallplate, which is typically secured to the wall․ This often involves gently pulling or unlatching the front cover․ Once the body is removed, you will expose the wiring connected to the terminals on the old wallplate․ It is strongly advised to take a clear photograph of the current wiring configuration․ Additionally, label each wire precisely with masking tape according to its terminal designation (e․g․, R, G, Y, W) before disconnecting them․ This meticulous documentation is vital for accurate connection to your new Honeywell 6000 thermostat․ After all wires are clearly marked and disconnected, unscrew the old wallplate from the wall․ Carefully pull the wallplate away, ensuring the labeled wires remain accessible and do not fall back into the wall cavity, preparing for the next installation steps․
Removing the Battery Holder
After carefully unboxing your new Honeywell FocusPRO 6000 Series thermostat, the next crucial step in preparing for installation is to remove the battery holder from the wallplate․ This action is typically performed before the wallplate itself is mounted to the wall․ To do this, locate the designated battery compartment, which often has a tab or a specific area indicating where to pull․ For the FocusPRO 6000, the manual frequently instructs you to “Pull here to remove the wallplate from the new thermostat,” and this often precedes or includes the removal of the battery holder․ Gently pull the battery holder out from its slot․ This step ensures that the wallplate is fully separated and ready for secure mounting to your wall, without the obstruction of the battery holder or the need to handle it during the wiring process․ Removing it now also prevents accidental battery installation or damage during the more physical aspects of wallplate positioning and securing․ Keep the battery holder in a safe place, as it will be reinstalled later once the wiring is complete and the thermostat body is attached․
Pulling Wires Through the Wallplate Hole
Once the old thermostat wallplate has been removed and the new Honeywell FocusPRO 6000 Series wallplate is ready for mounting, the next critical step is to carefully pull the existing thermostat wires through the designated wire hole․ This opening, typically located in the center of the new wallplate, is specifically designed to accommodate the bundle of low-voltage wires extending from your wall․ Gently thread all the wires through this central aperture, ensuring that they pass cleanly without any kinks or excessive bending․ It is important to pull enough slack through the hole so that you have ample length to comfortably connect each wire to its respective terminal on the wallplate in a later step, without strain․ Avoid pulling too forcefully, which could damage the wires or their insulation․ Having the wires correctly positioned through this hole is essential for a tidy and secure installation, setting the stage for the accurate wiring of your new Honeywell FocusPRO 6000 Series thermostat․
Positioning the Wallplate on the Wall
After pulling the thermostat wires through the wallplate’s central opening, the next step involves accurately positioning the wallplate on the wall․ Carefully place the new Honeywell FocusPRO 6000 Series wallplate against the wall, ensuring the wires extend neatly through its designated hole, without being pinched․ It is crucial at this stage to achieve a perfectly level placement for optimal operation and aesthetics․ Utilize a small spirit level to verify that the wallplate is horizontally and vertically aligned․ Proper leveling not only ensures a visually pleasing installation but also prevents any potential issues during the subsequent attachment of the thermostat unit itself․ Once the wallplate is precisely leveled and positioned where you intend to install the thermostat, firmly hold it in place․ Then, using a pencil, carefully mark the exact locations on the wall where the mounting screws will be inserted through the wallplate’s designated screw holes․ These precise markings will serve as your guide for the upcoming drilling process, ensuring a secure and straight installation․
Marking and Drilling Mounting Holes
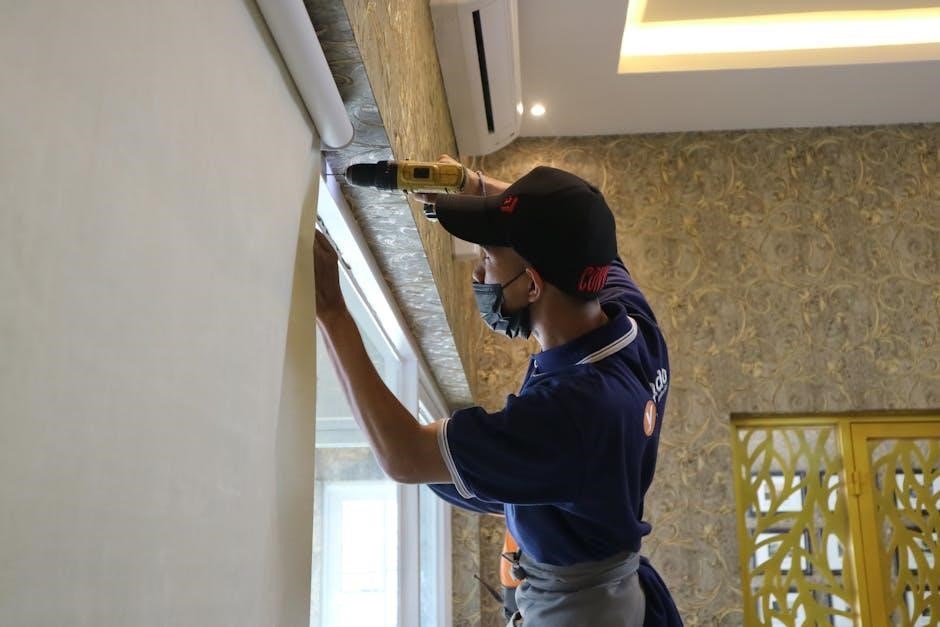
Once the Honeywell FocusPRO 6000 Series wallplate is perfectly positioned and leveled on the wall, the next critical step involves accurately marking the mounting hole locations․ Using a sharp pencil, carefully trace through each of the designated screw holes on the wallplate onto the wall surface․ Ensure these marks are precise, as they will guide your drilling․ After all the mounting points are clearly marked, remove the wallplate from the wall․ Now, prepare to drill the pilot holes․ Select an appropriate drill bit size, typically specified in the installation manual, that corresponds to the provided mounting screws or wall anchors, if applicable․ Carefully drill holes at each of the marked pencil points․ It’s essential to drill straight and to the correct depth, preventing damage to the wall or creating loose mounting points․ If you are drilling into drywall, consider inserting the provided plastic wall anchors into the drilled holes before securing the screws, which will ensure a robust and stable attachment for your new thermostat wallplate․ This careful preparation guarantees a secure foundation for the thermostat․
Wiring the Honeywell 6000 Thermostat
This section guides you through wiring your Honeywell FocusPRO 6000 thermostat for proper operation․ It covers essential steps to connect the system’s electrical wires securely, ensuring your new programmable thermostat effectively controls your heating and cooling equipment․

Connecting Wires to Terminals
Connecting wires to the Honeywell FocusPRO 6000 thermostat wallplate terminals is crucial for successful installation․ First, pull existing wires through the wallplate’s designated opening․ Identify each wire by color and function, consulting your system’s wiring diagram or the manual for clarity․ For a basic AC system, the red wire typically connects to the ‘R’ terminal, providing 24V power․ Other essential wires, such as those for cooling (Y), heating (W), and the common wire (C), must be securely attached to their corresponding labeled terminals․ Ensure each wire is stripped to the optimal length, allowing for a firm connection without exposing excessive bare copper․ Insert each prepared wire firmly into its designated terminal slot․ Some FocusPRO 6000 models feature push-in terminals, while others require loosening and tightening small screws to fasten them․ Always double-check all connections to confirm they are snug and adhere to your HVAC system’s wiring diagram․ This process ensures reliable communication between your new thermostat and equipment for optimal climate control․
Basic AC System Wiring Example
For a basic AC (straight cool) system, wiring your Honeywell FocusPRO 6000 series thermostat is straightforward․ Begin by identifying the wires coming from your HVAC unit․ The red wire, crucial for providing 24-volt power, must be securely connected to the ‘R’ terminal on the thermostat’s wallplate․ For cooling operation, the yellow wire should then be connected to the ‘Y’ terminal․ If your system utilizes a separate fan control, the green wire goes to the ‘G’ terminal, allowing independent fan activation․ Additionally, to provide continuous power to the thermostat, often necessary for advanced features or Wi-Fi models, the common wire (typically blue or black) connects to the ‘C’ terminal․ Before making any connections, always cross-reference with your old thermostat’s wiring or your HVAC system’s specific diagram to ensure accuracy․ Proper wire stripping and firm terminal seating are essential to guarantee reliable communication and efficient operation of your air conditioning system effectively․

Configuring Installer Setup Options
Access the installer setup menu by holding the ‘s’ and ‘t’ buttons․ Here, you configure crucial system parameters like auto mode and changeover valve settings, ensuring optimal thermostat operation for your home․
Accessing the Installer Setup Menu

To access the installer setup menu on your Honeywell FocusPRO 6000 Series thermostat, a precise action is required․ This menu is vital for advanced configuration, enabling tailored thermostat performance for your specific HVAC system and optimized energy usage․ It serves as a secure interface, specifically designed to prevent casual users from inadvertently altering critical operational settings․
Locate the ‘s’ (up arrow) and ‘t’ (down arrow) buttons on the thermostat’s front panel, typically used for temperature adjustments․ To enter setup mode, press and hold both ‘s’ and ‘t’ buttons simultaneously․ Hold them until the display undergoes a noticeable change․ This visual shift confirms successful transition from the standard operating screen into the installer setup environment, preparing you for configuration steps․ This initial access is fundamental before modifying any system parameters․
Setting Up Auto Mode Configuration
To configure the auto mode for your Honeywell FocusPRO 6000 Series thermostat, you must first access the installer setup menu․ This critical setting empowers the thermostat to intelligently switch between heating and cooling functions as needed, maintaining your desired temperature range automatically․ This provides optimal comfort and significantly enhances energy efficiency by preventing manual adjustments․ Once inside the installer setup menu, systematically navigate through the various options․ Repeatedly press the “next” button until the display shows “setup 12″․ This particular setup number is specifically designated for auto mode configuration․ Upon reaching “setup 12”, modify its current value to “1”․ This action effectively activates the essential auto changeover functionality․ After successfully setting the value to “1”, ensure you press “done” to securely save all your modifications and gracefully exit the installer setup menu․ Your Honeywell 6000 thermostat will then be fully primed to operate in auto mode, seamlessly managing your indoor climate with precision, adapting to environmental changes throughout the day․

Configuring Changeover Valve Settings
Configuring the changeover valve settings is crucial for heat pump systems, ensuring your Honeywell FocusPRO 6000 thermostat correctly controls both heating and cooling functions․ This specific setting dictates when the reversing valve within your heat pump is energized․ To adjust this, you must access the Installer Setup menu․ Once you are within the setup, locate the dedicated option for the changeover valve․ You will typically find two choices: ‘O’ or ‘B’․ The ‘O’ setting indicates that the changeover valve is energized during the cooling mode, which is the standard configuration for a majority of heat pump systems․ Conversely, the ‘B’ setting means the valve is energized in heating mode, a less common but specific setup for particular heat pump models․ Correctly selecting either ‘O’ or ‘B’ ensures your heat pump operates efficiently and delivers the precise comfort you expect, preventing scenarios where the system might mistakenly heat when cooling is required, or vice-versa․ Always consult your heat pump’s manufacturer specifications to confirm the appropriate changeover valve setting for your unit before finalizing the thermostat configuration for optimal performance․

Key Thermostat Features
The Honeywell FocusPRO 6000 series thermostats boast essential functionalities designed for comfort and system longevity․ Key features include robust compressor protection to safeguard your HVAC equipment and Adaptive Intelligent Recovery for optimal temperature attainment․
Compressor Protection
The Honeywell FocusPRO 6000 Series thermostats include vital compressor protection․ This crucial feature safeguards your HVAC system by preventing damaging short cycling, where the compressor repeatedly turns on and off too frequently․ Rapid cycling causes excessive wear, drastically shortening its lifespan and leading to expensive repairs or premature failure․
To prevent this, the FocusPRO 6000 enforces a minimum off-time, typically five minutes, between heating or cooling cycles․ After a cycle, the thermostat intelligently delays the compressor’s restart․ This pause allows system refrigerant pressures to properly equalize․ Equalized pressures reduce strain during startup, enhancing efficiency and durability․ This built-in safeguard extends your HVAC unit’s operational life, ensuring consistent, reliable performance, and offering peace of mind for FocusPRO 6000 users․
Adaptive Intelligent Recovery
The Honeywell FocusPRO 6000 Series offers Adaptive Intelligent Recovery, a smart feature optimizing both comfort and energy use․ This function learns your home’s heating and cooling patterns over time, precisely anticipating how long it takes to reach set temperatures․
Rather than waiting until a programmed schedule time, the thermostat intelligently calculates the precise moment to activate your HVAC system․ For instance, if you desire 70°F by 6:00 AM, the system will start earlier․ This ensures the target temperature is met exactly on schedule, eliminating manual pre-adjustments․ You experience immediate comfort upon waking or returning home․ This system efficiently prevents temperature overshoots, ensuring timely attainment and delivering consistent environmental control for a more comfortable, energy-efficient living space․